




Common Apartment Inspection Mistakes Tenants Should Avoid Before Moving In
Inspecting an apartment properly before moving in can save tenants from unnecessary repairs, disputes and unexpected expenses later. A property may look clean during a quick viewing but still have leaking taps, weak air conditioning, damaged appliances, poor water pressure, electrical problems or marks that could later be blamed on the tenant.
- How to Inspect an Apartment Before Moving In Step by Step
- Check Walls, Floors, Ceilings and Existing Damage
- Test the Air Conditioning Before Accepting the Apartment
- Inspect the Kitchen and Test Every Appliance
- Inspect Bathrooms for Leaks, Drainage and Water Pressure
- Check Doors, Windows, Locks and Balcony Areas
- Test Electricity, Lights and Power Sockets
- Check Water, DEWA Setup and Utility Readiness
- Create a Detailed Move-In Condition Report
- Agree Which Repairs Must Be Completed Before Move-In
- Check Building Facilities and Common Areas
- A Practical Apartment Inspection Checklist
Learning how to inspect an apartment before moving in is therefore an important part of renting a home in Dubai. The best time to identify problems is before furniture arrives and before you begin using the property. At that stage, it is much easier to photograph existing damage, report maintenance issues and agree with the landlord or property manager on what should be repaired.
The inspection should go beyond checking whether the apartment looks attractive. Tenants should test electricity, water, air conditioning, doors, windows, kitchen appliances, bathrooms and safety features. They should also look closely at walls, floors, ceilings and built-in furniture for damage.
Utility setup is another important part of moving in. Dubai Electricity and Water Authority currently integrates its Move-In service with Ejari for many rental properties. Once Ejari is issued, DEWA can receive the tenancy information automatically and send the tenant details for the security deposit and utility activation. DEWA states that electricity and water are generally activated within 15 working hours after the required deposit and connection charges are paid.
That makes the period between signing the tenancy and physically moving in the ideal time to carry out a detailed inspection.
This guide explains what tenants should check in every room, how to document existing damage, what to test before accepting the apartment and how to create a move-in record that protects both the tenant and landlord.
How to Inspect an Apartment Before Moving In Step by Step
The easiest way to inspect an apartment properly is to follow the same order every time.
Do not simply walk around looking at whatever catches your attention.
Use a structured inspection.
Start before bringing furniture
The apartment should ideally be empty.
This makes it easier to inspect:
- Floors
- Walls
- Corners
- Cabinets
- Electrical points
- Windows
Furniture can hide damage.
Bring basic inspection tools
Useful items include:
- Smartphone
- Charger
- Small flashlight
- Tissue or paper towel
- Notes app
- Measuring tape
Your phone is particularly useful because it allows you to:
- Take photographs
- Record videos
- Test Wi-Fi signal later
- Photograph meter readings
Inspect during daylight if possible
Natural light makes it easier to identify:
- Paint damage
- Cracks
- Stains
- Window problems
However, also switch on every light so electrical fixtures can be tested.
Use the same sequence
A practical inspection order could be:
- Entrance
- Living room
- Bedrooms
- Kitchen
- Bathrooms
- Balcony
- Utilities
- Final photo record
This reduces the chance of forgetting an area.
Check Walls, Floors, Ceilings and Existing Damage
Visible surfaces are one of the most important parts of a move-in inspection because damage may later become part of a security-deposit discussion.
Inspect carefully before placing furniture against the walls.
Walls
Look for:
- Cracks
- Holes
- Peeling paint
- Scratches
- Water stains
- Mould
- Poor repainting
Small marks may not seem important now, but photograph them.
Ceilings
Look closely around:
- Bathrooms
- Air-conditioning vents
- Kitchen
- Windows
Brown or yellow marks can suggest past water leakage.
Fresh paint covering only one small section may also be worth asking about.
Floors
Check:
- Broken tiles
- Cracked marble
- Scratched wood
- Loose flooring
- Stains
Walk across the entire apartment.
Listen for loose or hollow tiles.
Baseboards and corners
Damage is often easier to miss here.
Look for:
- Chips
- Water swelling
- Paint damage
- Signs of insects
Photograph everything
Take wide photographs showing the room and close-up photographs showing the specific damage.
A good photo record should make it obvious:
- Where the damage is
- What condition it was in
- That the image was taken before occupancy
Keep the original files.
Test the Air Conditioning Before Accepting the Apartment
Air conditioning is essential in Dubai.
A unit that appears to work during a quick viewing may not cool the apartment properly.
Test every room individually.
Turn the AC on
Set the thermostat lower than the current room temperature.
Wait several minutes.
Check whether:
- Cool air comes through
- Airflow is strong
- Temperature begins dropping
Listen for unusual noise
Watch for:
- Rattling
- Loud vibration
- Clicking
- Continuous buzzing
These may indicate maintenance problems.
Check vents
Look for:
- Dust buildup
- Water droplets
- Dark marks
- Weak airflow
Water leaking from an AC vent should be reported immediately.
Check thermostats
Make sure:
- Screen works
- Temperature changes
- Controls respond
If the apartment has separate thermostats for different rooms, test each one.
Ask about maintenance
Clarify who handles:
- AC servicing
- Filters
- Emergency repairs
The tenancy contract may define maintenance responsibilities.
Understand this before moving in.
Inspect the Kitchen and Test Every Appliance
The kitchen contains many items that can fail and become expensive to repair.
Do not assume an appliance works simply because it is installed.
Check cabinets
Open every cabinet.
Look for:
- Broken hinges
- Loose handles
- Water damage
- Insects
- Bad smells
Cabinets below the sink deserve particular attention because leaks often appear there first.
Check the sink
Run both hot and cold water.
Test:
- Water pressure
- Drainage
- Tap stability
- Leaks
Place a tissue around pipes underneath the sink after running the water.
If it becomes wet, there may be a leak.
Inspect worktops
Look for:
- Cracks
- Burns
- Deep scratches
- Stains
Record existing damage.
Test appliances
If appliances are included, test:
- Refrigerator
- Oven
- Cooker
- Dishwasher
- Washing machine
- Microwave
Do not rely only on indicator lights.
Check that the appliance actually performs its basic function where practical.
Refrigerator
Confirm that:
- Interior light works
- Door closes properly
- Shelves are intact
- Cooling starts
Oven and cooker
Test each burner.
Check that the oven heats.
Washing machine
Inspect:
- Door seal
- Water connections
- Drain hose
If possible, run a short cycle before moving in.
Inspect Bathrooms for Leaks, Drainage and Water Pressure
Bathrooms are one of the most important areas because small plumbing problems can quickly become serious.
Inspect every bathroom separately.
Test every tap
Run:
- Sink
- Shower
- Bath, if present
Check hot and cold water.
Look at water pressure.
Weak pressure could indicate a problem.
Flush every toilet
Check:
- Flush strength
- Refill
- Leaks around the base
A toilet that runs continuously can waste water and create noise.
Check drains
Run the shower for long enough to see whether water drains properly.
Watch for pooling.
Slow drainage may indicate a blockage.
Look underneath sinks
Check pipes and cabinets for:
- Moisture
- Stains
- Swelling
- Mould
Inspect sealant
Look around:
- Shower
- Bath
- Sink
- Toilet
Damaged silicone can allow water to reach walls or cabinets.
Check exhaust fans
Turn them on.
Poor ventilation can contribute to moisture and mould.
Inspect mirrors and fittings
Record:
- Cracked mirrors
- Loose towel rails
- Damaged shower fittings
- Broken shelves
Check Doors, Windows, Locks and Balcony Areas
Security and weather sealing should also be part of the inspection.
Main entrance
Check:
- Door lock
- Handle
- Key
- Door frame
Make sure the door closes properly without needing excessive force.
Bedroom doors
Open and close each one.
Look for:
- Scraping
- Loose hinges
- Broken handles
Windows
Open and close every window.
Check:
- Locks
- Handles
- Seals
- Glass
Look for cracks or gaps.
Poor seals can allow:
- Dust
- Heat
- Noise
into the apartment.
Balcony doors
Test the lock carefully.
If the home is occupied by children, check whether extra safety measures may be necessary.
Balcony
Inspect:
- Tiles
- Drainage
- Railings
- Glass panels
Look for loose fittings or visible damage.
Check external noise
Stand quietly with the windows closed.
Then open them.
This helps you understand how much traffic or construction noise reaches the apartment.
A property can feel very different at rush hour compared with a quiet daytime viewing.
Test Electricity, Lights and Power Sockets
Electrical problems may not be obvious until you start living in the property.
Test as much as possible before moving in.
Switch on every light
Check:
- Ceiling lights
- Wall lights
- Bathroom lights
- Balcony lights
Record any bulbs or fixtures that do not work.
Test sockets
Use a phone charger.
Test outlets in:
- Living room
- Bedrooms
- Kitchen
- Bathrooms where applicable
A socket may look fine but have no power.
Check switches
Look for:
- Loose switches
- Cracked covers
- Sparking
- Unusual heat
Do not touch visibly damaged electrical fittings.
Report them.
Check the distribution board
Locate the electrical breaker panel.
Make sure:
- It is accessible
- Labels are readable where provided
- Nothing appears visibly damaged
Knowing where the main breaker is located can be useful later.
Test doorbell and intercom
If the building has an intercom system, check:
- Audio
- Video
- Building access
This is often forgotten during apartment inspections.
Check Water, DEWA Setup and Utility Readiness
An apartment may appear ready for occupancy while utility activation is still pending.
Confirm the status before planning your move.
For standard Ejari-connected properties, DEWA’s current Move-In process is integrated with tenancy registration. After Ejari issuance, the tenant can receive a DEWA account number, security-deposit information and payment link.
DEWA currently lists a refundable residential security deposit of:
- AED 2,000 for an apartment
- AED 4,000 for a villa
Supply activation charges also apply.
Before moving in, check
- Electricity is active
- Water is active
- DEWA account is correctly linked
- No obvious meter issue exists
Record meter information
Where accessible, photograph:
- Electricity meter
- Water meter
- Premises number
This gives you a record of the starting position.
Test hot water
Turn on the hot-water system and check whether hot water is available after an appropriate period.
Look for hidden leakage
After running taps, inspect:
- Under sinks
- Around toilets
- Around kitchen pipes
Leaks may only appear after water runs for several minutes.
Know the utility timeline
DEWA states that electricity and water are generally connected within 15 working hours after payment of the required security deposit and activation charges.
Plan your physical move accordingly.
Create a Detailed Move-In Condition Report
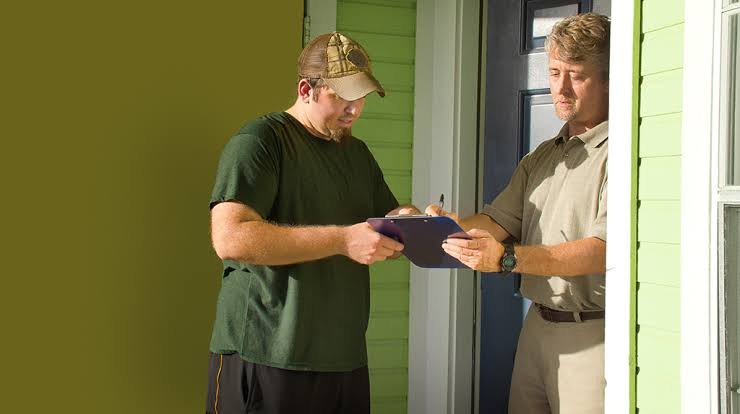
The most important part of an inspection is not simply discovering damage.
It is documenting it.
A condition report creates a record of how the apartment looked before you started living there.
Document each room
A simple report can look like this:
| Area | Condition | Issue |
|---|---|---|
| Living room wall | Existing marks | Three scratches near window |
| Bedroom floor | Damaged | Small tile crack |
| Kitchen cabinet | Loose | Hinge needs repair |
| Guest bathroom | Leak | Water below sink |
| Balcony door | Damaged | Lock difficult to close |
Add photographs
Number or label the photos.
For example:
Photo 01 – Living room wall
Photo 02 – Kitchen sink leak
Photo 03 – Bedroom floor crack
This makes the report easy to understand.
Use video as additional evidence
Walk slowly through the apartment while recording.
Capture:
- Walls
- Floors
- Fixtures
- Appliances
Photos are still useful because they show individual details clearly, but video gives wider context.
Send the report quickly
Do not keep the inspection record only on your phone.
Send it to the landlord, agent or property-management company through a traceable channel such as email.
Ask them to acknowledge receipt.
Keep the response
Save confirmation that:
- Existing issues were reported
- Maintenance requests were accepted
- Repairs were promised
This can become useful later.
Agree Which Repairs Must Be Completed Before Move-In
Not every small mark requires repair.
Focus first on issues affecting:
- Safety
- Utilities
- Water
- AC
- Security
- Major appliances
High-priority issues
These can include:
- Water leaks
- Electrical faults
- Broken locks
- Non-working AC
- Serious drainage problems
- Dangerous broken glass
Ideally, these should be resolved before occupancy.
Cosmetic issues
Examples include:
- Minor wall marks
- Small scratches
- Paint chips
You may decide not to request repairs.
But document them anyway.
Get promises in writing
Avoid relying only on:
“The maintenance team will come later.”
Ask for:
- Issue
- Responsible party
- Expected action
in writing.
Inspect repairs
If maintenance is completed before move-in, check the work.
Do not assume the problem is solved because someone says it is.
For a leak, run the water again.
For AC, test cooling.
For a lock, open and close the door.
Check Building Facilities and Common Areas
The apartment itself may be excellent while the building creates daily problems.
Inspect the common facilities as well.
Lifts
Check:
- Number of lifts
- Condition
- Waiting time
In a large tower, too few working lifts can become frustrating.
Parking
If parking is included, confirm:
- Space number
- Location
- Access card
Make sure another vehicle is not occupying the assigned space.
Gym and pool
If these facilities influenced your rental decision, check whether they are:
- Open
- Maintained
- Available during useful hours
Security
Look for:
- Reception
- Access control
- CCTV
- Visitor procedures
Waste disposal
Find the rubbish room or disposal area.
Check whether it appears reasonably clean and maintained.
Move-in rules
Some buildings require:
- Move-in permit
- Elevator booking
- Approved moving hours
Ask building management before the moving truck arrives.
A Practical Apartment Inspection Checklist
Use this checklist during the handover.
Walls and floors
- Walls checked
- Ceiling checked
- Floors checked
- Cracks photographed
- Existing stains recorded
- Water damage checked
Air conditioning
- Every AC unit tested
- Thermostats work
- Airflow checked
- No leakage
- No unusual noise
Kitchen
- Sink tested
- Pipes checked
- Cabinets inspected
- Refrigerator tested
- Cooker tested
- Oven tested
- Washing machine checked
Bathrooms
- Toilets flushed
- Showers tested
- Water pressure checked
- Hot water checked
- Drains checked
- Leaks checked
- Exhaust fans tested
Electrical
- Lights tested
- Sockets tested
- Switches checked
- Intercom tested
- Doorbell tested
Doors and windows
- Main lock works
- Internal doors work
- Windows open and lock
- Balcony lock checked
- Glass inspected
Utilities
- DEWA activation confirmed
- Premises number recorded
- Meter readings photographed
Documentation
- Photos taken
- Videos recorded
- Damage list prepared
- Report sent to landlord/agent
- Written acknowledgement saved
Most important checks at a glance
| Check | Why It Matters |
|---|---|
| AC | Essential for Dubai climate |
| Water leaks | Can cause major damage |
| Electrical sockets | Safety and daily use |
| Doors and locks | Security |
| Appliances | Avoid repair disputes |
| Walls/floors | Security-deposit protection |
| DEWA | Ensures utilities are ready |
| Photo record | Documents existing condition |
Learning how to inspect an apartment before moving in can make the difference between a smooth tenancy and months of maintenance problems.
Start with the physical condition.
Look carefully at walls, floors and ceilings and photograph every existing mark or defect. Then test the systems you will depend on every day.
Run every tap.
Flush every toilet.
Switch on the air conditioning.
Test power sockets.
Open every window.
Check every lock.
If appliances are included with the tenancy, test them before accepting responsibility for the property.
Utility readiness should also be confirmed. For many Dubai rental properties, DEWA’s Move-In process is integrated with Ejari, allowing tenancy information to flow automatically into the utility setup process. DEWA currently states that supply is normally activated within 15 working hours after the security deposit and connection fees are paid.
Most importantly, create a clear condition report.
Take photographs and video before furniture arrives and send a written list of existing issues to the landlord or property manager. Keep evidence that the report was received.
Not every scratch needs to be repaired, but every existing defect should ideally be documented.
A detailed inspection may require more effort on moving day, but it can prevent much bigger problems later. When both the tenant and landlord have a clear record of the apartment’s original condition, repairs, responsibilities and the eventual move-out process become much easier to manage.
Do follow us on Instagram
Read More – How to Choose a Home Close to Dubai Metro